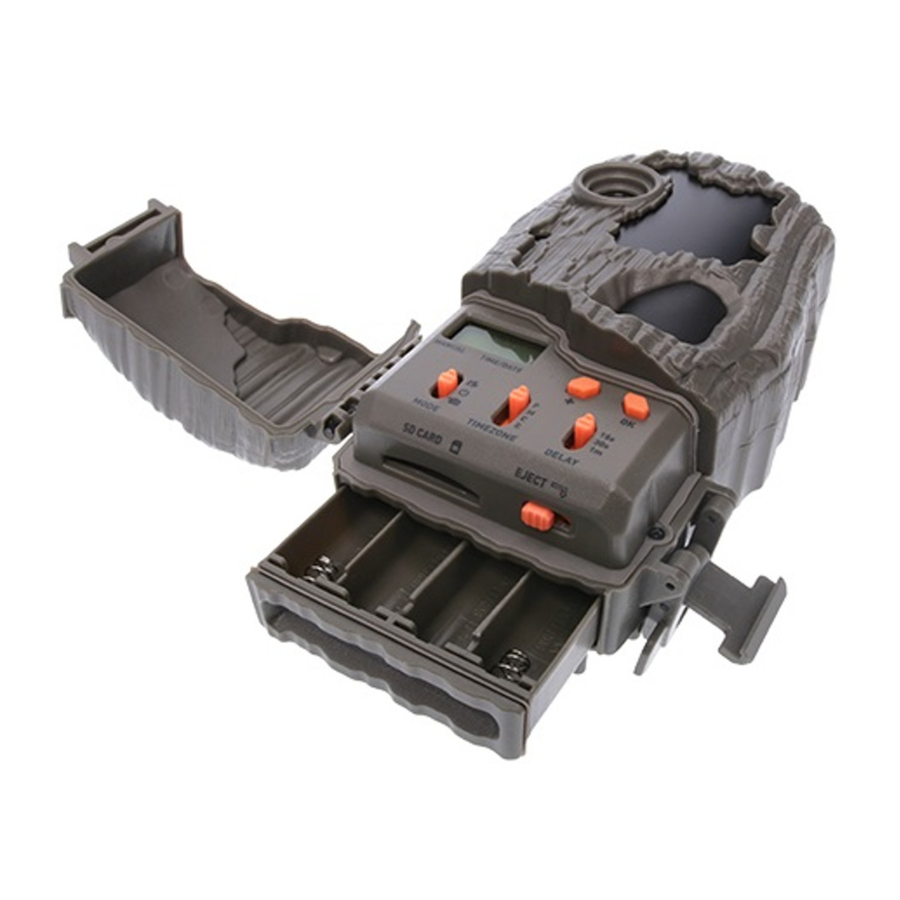


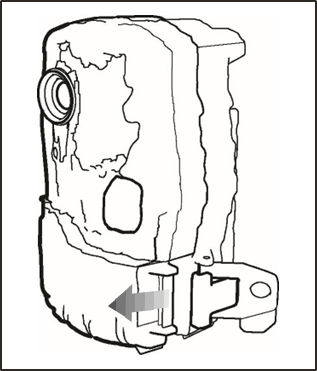
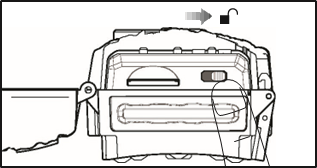
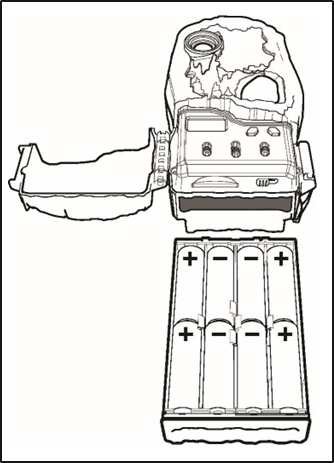
NOTE:
Do not mix old and new batteries.
Do not mix alkaline, standard (carbon-zinc) or rechargeable (ni-cad, ni-mh, etc) batteries.
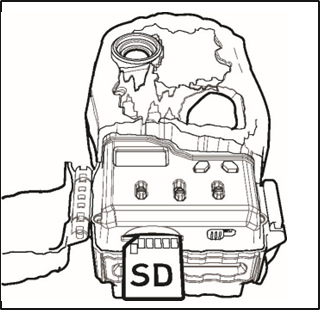

Make sure the camera is powered off before removing or installing an SD card.
If you are using an SD card from other cameras, please make sure to format the SD card in your computer prior to use in your camera. New cards are ok to use straight from the package.
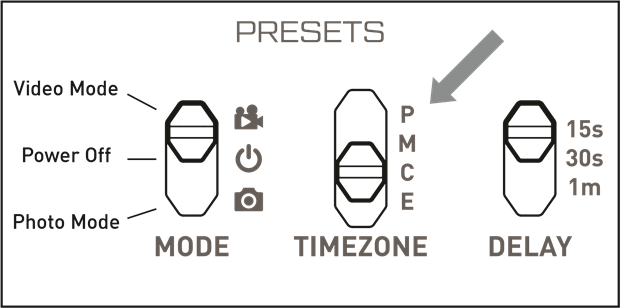
P - On behalf of the Pacific region, the time after the camera successfully receives the RCC signal will be reduced by 8 hours from the time set on the signal transmitter; UTC -8hr
M - On behalf of the Mountain region, the time after the camera successfully receives the RCC signal will signal will be reduced by 7 hours from the time set on the signal transmitter; UTC -7hr
C - On behalf of the Central region, the time after the camera successfully receives the RCC signal will signal will be reduced by 6 hours from the time set on the signal transmitter; UTC -6hr
E - On behalf of the Eastern region, the time after the camera successfully receives the RCC signal will signal will be reduced by 5 hours from the time set on the signal transmitter; UTC -5hr
Delay is the time for the camera to take the next photo or video after 15 seconds, 30 seconds, or 1 minute.
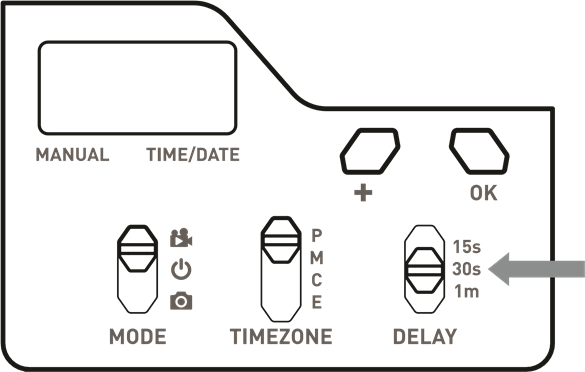
Note: the camera's test LED will blink on each photo/video trigger for the first 3 minutes of operation. After that time, the test LED will remain off.
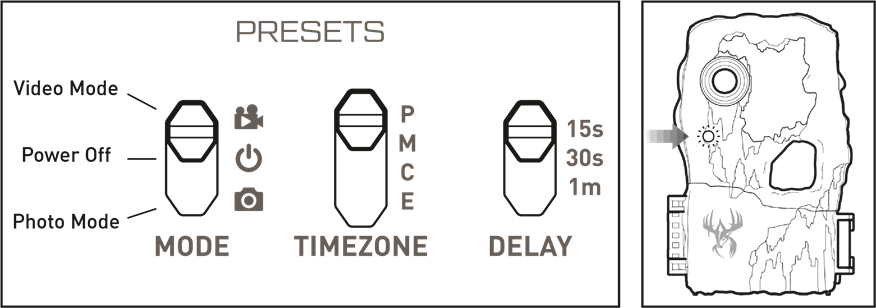
While the camera is switched on, if the OK button is pressed then the LCD will light up.
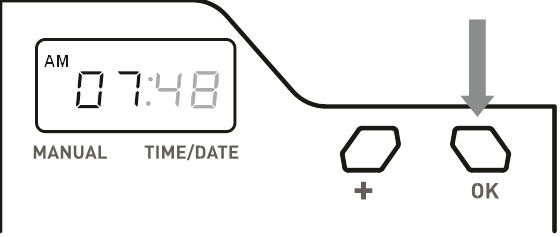
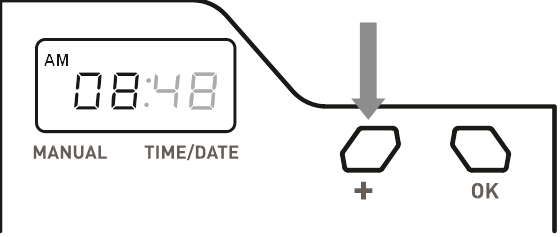
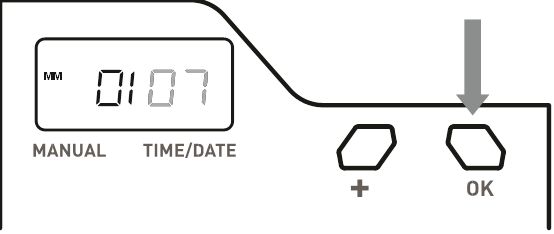
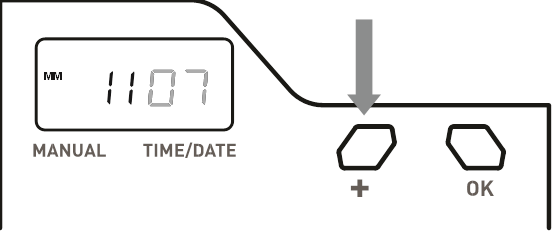
This camera can automatically acquire the time and date from the atomic clock radio station WWVB. To initiate the sync, press and hold the + button for 5 seconds while powering the camera on.
The camera will then attempt to sync. During this time, the test LED will blink yellow and the LCD screen will display the word SYNC. When the time is acquired, the test LED will blink green and the camera will briefly display the acquired time before capturing photos/videos.
If the camera is not able to acquire the time after 10 minutes of syncing, the LED will blink red and the LCD will display the last saved time. The camera will attempt to sync every 6 hours, but will continue to capture photos/videos during that time.
If the time is successfully acquired or is manually set, the camera will attempt a sync at 1AM every day to ensure that the time is accurate. The test LED will not light up during this sync to avoid alerting animals, but the screen will still display SYNC.

PICTURES DISPLAY:
IMPORTANT TIPS:

You can also use the WGI SD Card Reader for Apple or Android to access and upload your photos to the cloud using the WGI Huntsmart app on your mobile device.
Having trouble with your SD card? Try this.
Press and hold the OK button for 5 seconds while turning the camera on. While the camera is formatting the card, the LCD screen will display DLT (delete).
formatting your SD card will delete all files placed on it.
SDXC CARDS ARE NOT SUPPORTED
Your Wildgame Innovations scouting camera is covered by a 365 Day Limited Warranty on parts and labor from the date of original purchase, and purchases must be made through an authorized dealer. The warranty covers defects in workmanship and materials. The warranty does not apply to units, which have been damaged or abused intentionally or unintentionally. A purchase from individuals or unauthorized Internet sites such as eBay voids the warranty.
This camera must be registered with Wildgame Innovations via web, email, or customer service phone support, and accompanied with a reciept from the point of purchase, for any Factory Reset options to be available.
Tampering with or altering the unit will void the warranty. Any unauthorized service will void warranty. A copy of your original sales receipt must be produced for any warranty service and a Return Authorization (RA) number must be obtained from customer service at 1.888.508.5922 prior to returning product.
Wildgame Innovations is not responsible for any lost untraceable packages or those without a Return Authorization at the time of return.
Technical Support Email:
Customerservice@gsmorg.com
Please allow 48 hours for email response.
Wildgame Innovations
P.O. Box 535189
Grand Prairie, TX 75053-9504
Customer Service
Toll Free: 877-269-8490
Call Center Hours
Mon – Fri / 8AM – 5 PM (CST)
FCC STATEMENT
MODEL# WGI-SWTC2LO
Product Name: Digital Game Scouting Camera
Trade Name: Wildgame Innovations
NOTE: This equipment has been tested and found to comply with the limits for a Class B digital device, pursuant to part 15 of the FCC Rules. These limits are designed to provide reasonable protection against harmful interference in a residential installation. This equipment generates, uses and can radiate radio frequency energy and, if not installed and used in accordance with the instructions, may cause harmful interference to radio communications. However, there is no guarantee that interference will not occur in a particular installation. If this equipment does cause harmful interference to radio or television reception, which can be determined by turning the equipment off and on, the user is encouraged to try to correct the interference by one or more of the following measures:
Changes or modifications not expressly approved by the party responsible could void the user's authority to operate this device. Product specifications are subject to change. Wildgame Innovations is not responsible for any photographic or typographical errors.


GSM, LLC P.O. Box 535189
Grand Prairie, Texas 75053 Toll-free 877-269-8490
www.gsmoutdoors.com
www.wildgameinnovations.com

![]()
Here you can download full pdf version of manual, it may contain additional safety instructions, warranty information, FCC rules, etc.